Seal Your Roof Before it Leaks
Roof maintenance is easy to neglect, especially if you don’t have an attached ladder. However, it is important to keep your roof clean, inspect it often, and check and re-caulk regularly if you notice peeling or small holes. If you seal your roof before it gives you problems, you’ll prevent a leaky roof in the future.
Preventing Leaks
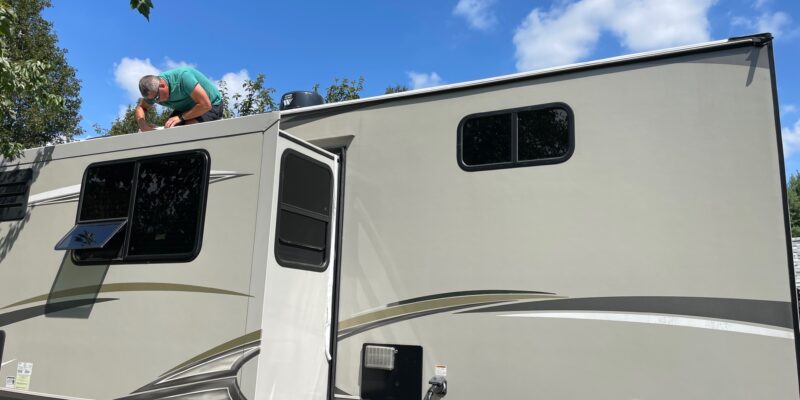
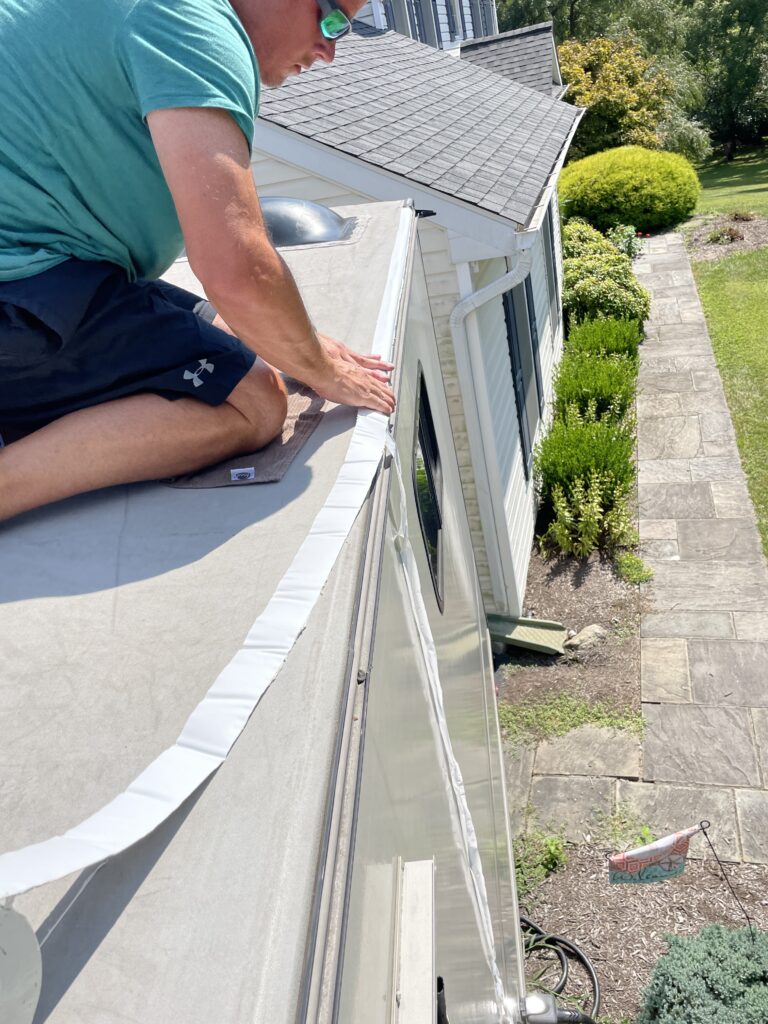
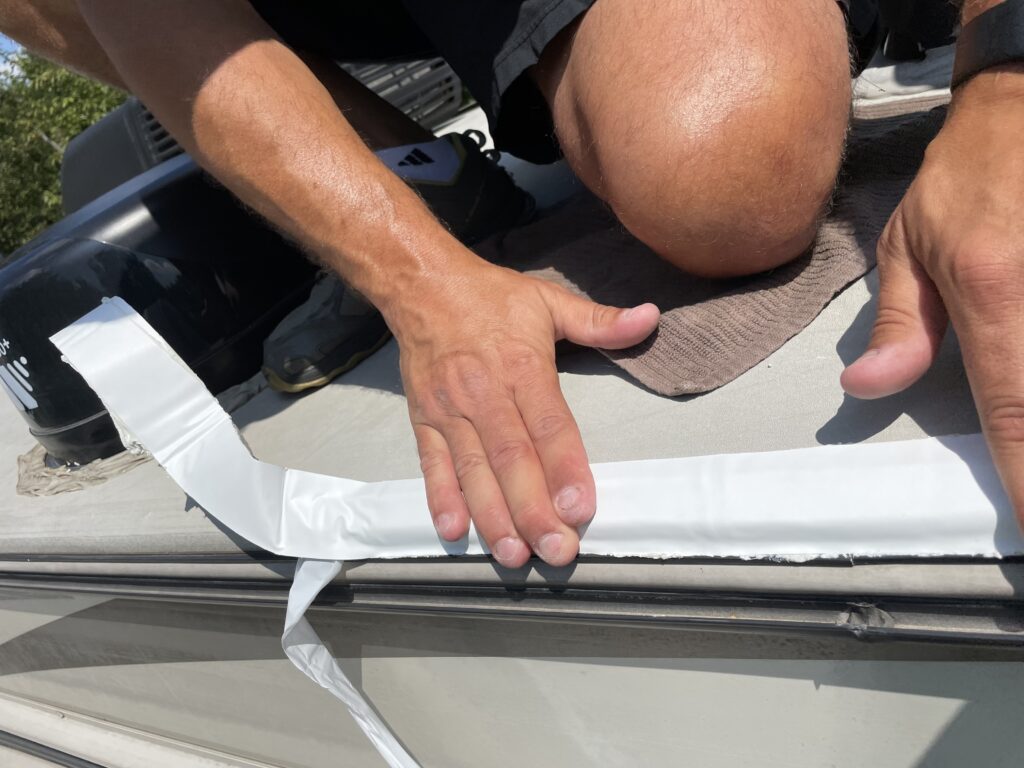
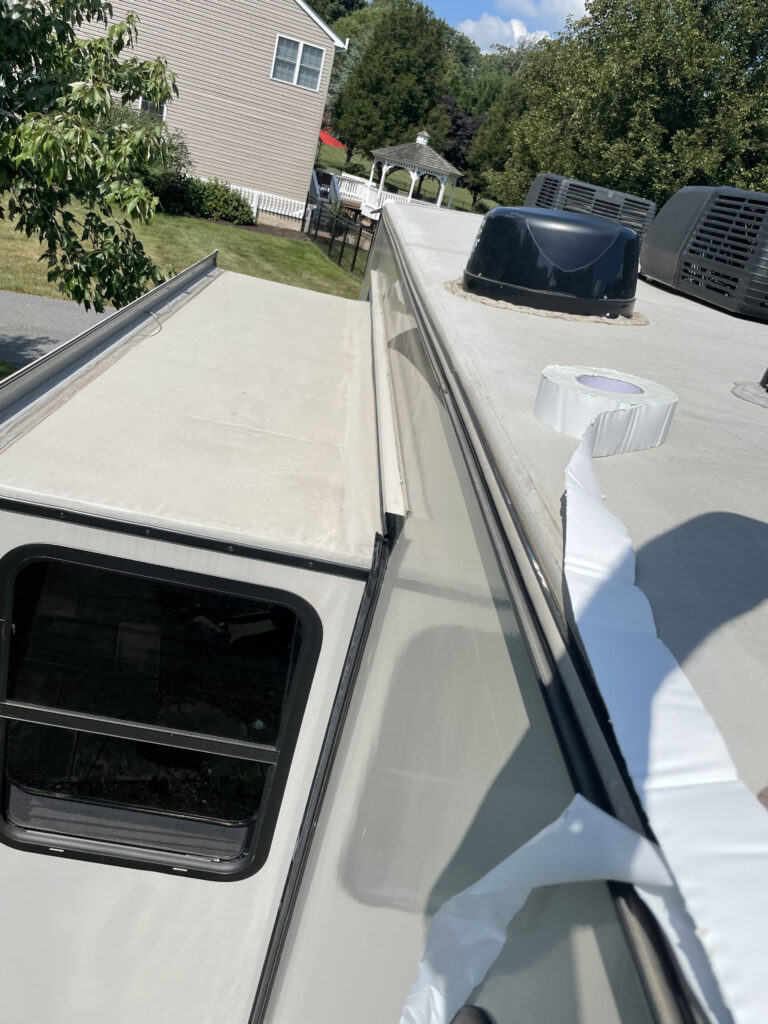
When we bought our new RV, we took on some preventative maintenance items to avoid some of the typical RV troubles. Even though it was new, we inspected all of the seals and added more lap sealant to some areas that didn’t look great from the factory. What is the one thing we didn’t do to help prevent roof issues? We didn’t over-seal the edges of the roof. We didn’t know about adding a layer of RV sealant tape to edge the roof line. After we returned from our Summer adventure we inspected the RV and noticed a few small snags along the edge of the roof. These were extremely tiny, but left unchecked they could result in bigger issues down the road. This led us to tackle the simple job of using RV sealant tape to cover all of the edges.
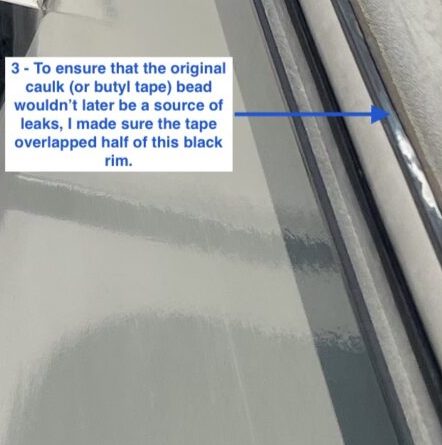
Often, these tiny holes start around the edges are due to the soft roof material being wrapped over a sharp corner of the plywood roof. If any debris or branch hits the corner of the roof it could cause a snag or even tear. The sharp corner is hardly noticeable if you don’t really inspect it. It is definitely a weak point in the roof design. The roof sheeting material is not nearly as tough as the RV Sealant Tape, which can better withstand impact and simply provide an additional layer that must be breached before a hole is created.
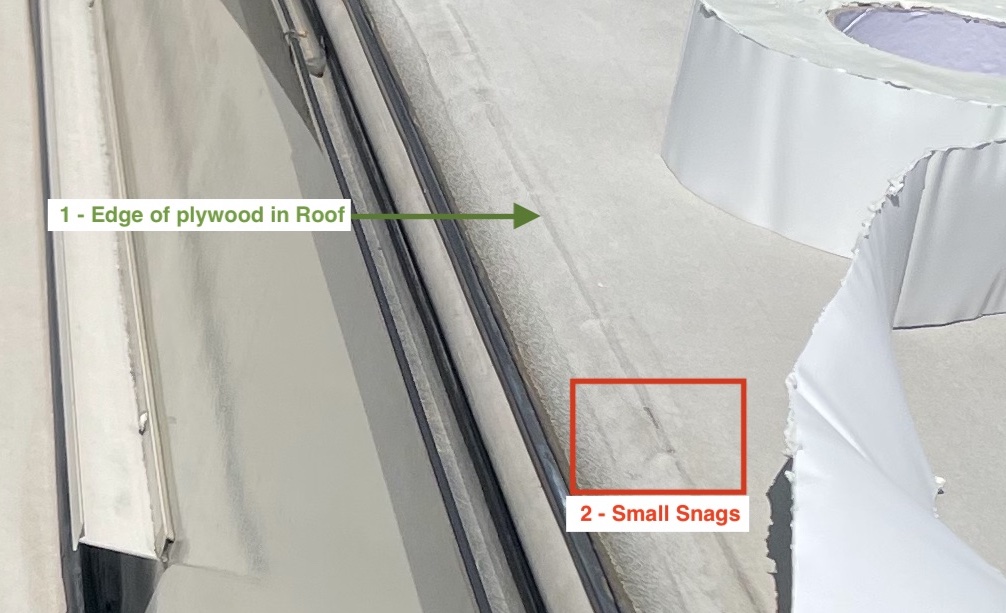
2 – If you look close you can see a little tear and a mound up along the plywood corner
Preparing to Seal the Roof
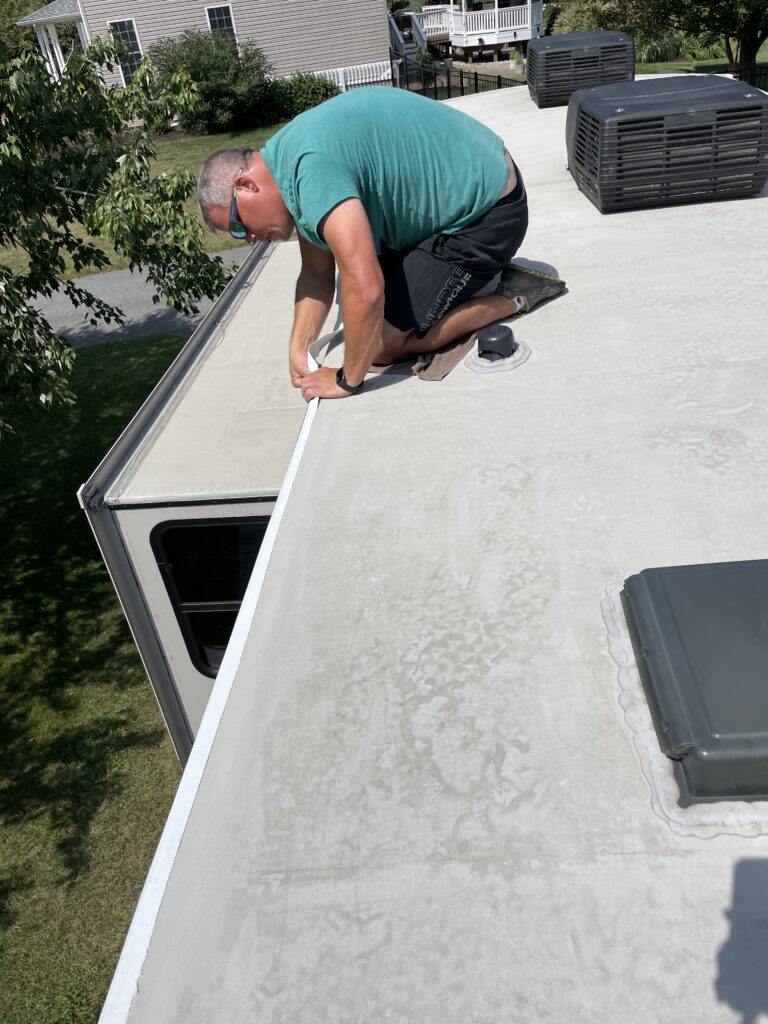
The task to tape the edge of the roof (reinforcing the existing seal) took us about 30-60 minutes. That included cleaning the surface on the first pass and allowing it to dry before starting to apply the tape.
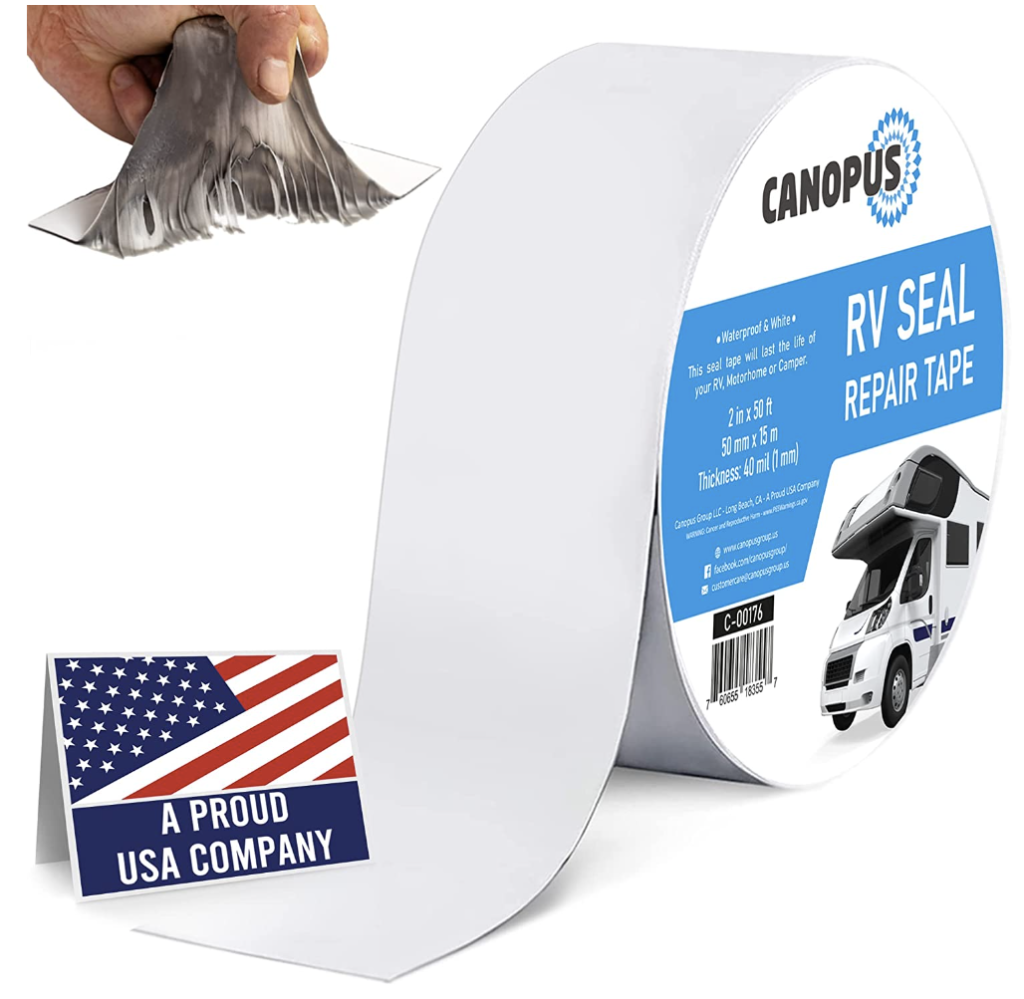
Check the type or roof you have, and if this product is appropriate, it’ll be money well-spent. It only takes a few minutes sealing your roof to prevent a disaster. Below, we will describe our personal process. Before we tackled the project we watched this video on YouTube by the Wandering Weekends channel. They referred to this step as one of the must do items in order to “bulletproof your roof”. This is something I would highly recommend to all new owners (even with a brand new camper).
How to seal your RV’s roof
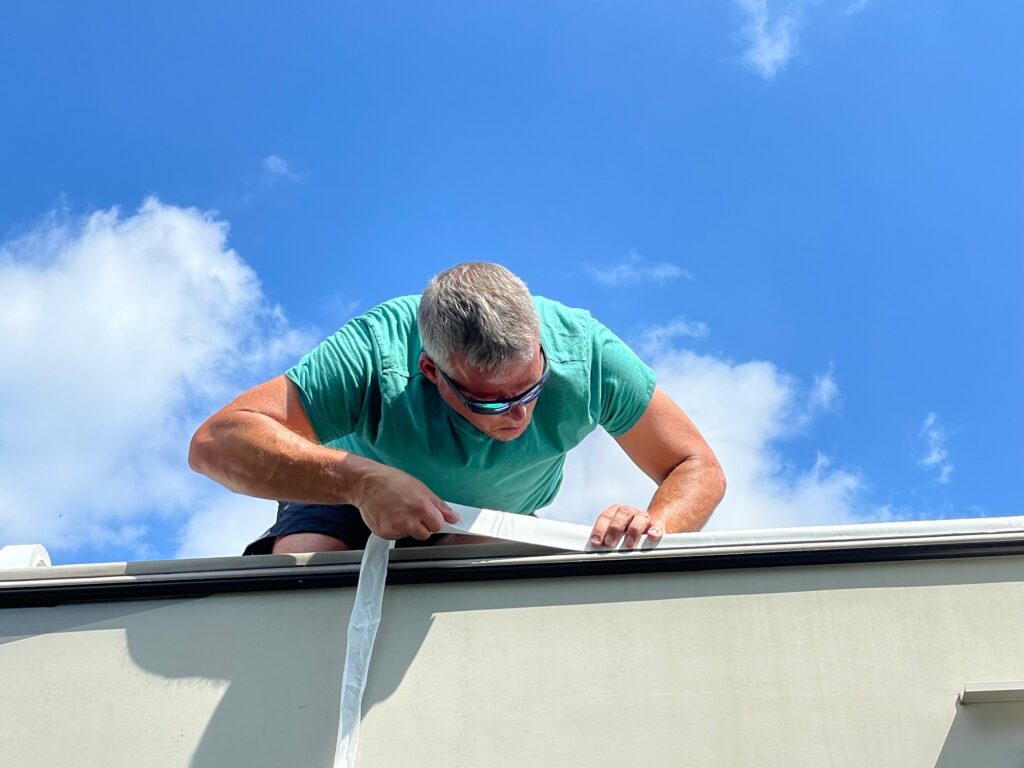
First, measure the distance you plan to seal before purchasing the RV Sealant Tape. We sealed the roof along the edges, but we have seen others who tape around the vents and other items on the roof. To prepare your roof, you only need to clean and dry the roof where you plan to apply the tape. If you have time, it wouldn’t hurt to clean the entire roof and check for any other trouble spots. We did a quick cleaning by using a sponge with Dawn dish soap in warm water. It was hot out, so it dried quickly.
We cannot recommend this product enough. We’d assume any similar brand would do just fine (but as always, read the reviews). It was easy to work with, inexpensive, and seems durable. If you get up on the roof, we encourage you to have a second person spotting you. They can even hand you materials and making sure you are being safe. It gets very warm and windy on the roof, so pick a day that offers you great weather.
Side Note: Our RV is tan, but the tape we bought was white. We were worried the mis -matched color would look terrible. However, after completing the work with a nice straight edge, it looks great and not like some DIY patch job. It probably helps if you can buy a roll of tape long enough to not need overlapping joints.
As an Amazon Associate, we earn from qualifying purchases. Many (but not all) of the links on embarkrv.com are affiliate links. We may make a small commission on the sale of an item if you purchase through one of these links. The price of the item is the same for you whether it is an affiliate link or not. Using affiliate links helps us to maintain this website and bring you other great content. We have not been paid for our review of products. What we are recommending is based on our use and experiences while RVing.